GRAHAM BY GUTELIUS.
TUTORIALS
Look for the New Tutorial Movies & Interactive PDFs on Graham Technique for Sale
This excerpt is from the Martha Graham Technique video set, "Guidelines in Contemporary Dance Training," Part 1, Floorwork (84 minutes). Introduces students to Graham Technique at the the beginner level using slow-motion, animations & freezes.
Three Breaths To Your Deepest Contraction
This is step 1 for a beginner in Graham Technique. The purpose of this exercise is to create an awareness of movement from the inside out as the foundation for future training.
By exaggerating normal breathing, a very thin thread of breath is experienced that awakens the nascent core muscles that are essential to the performance of Graham-based physicality. The hips turn under or lift, the ribs expand or fold, and the sternum lifts or drops with the breath. Ultimately by workinging from the inside out arm, leg, and head movements will be dependent on the the larger muscles centered in the hips, back, and low abdominals, resulting in the flowing, weighted, visceral quality of movement associated with Graham vocabulary.
Working Off Center in a Martha Graham Technique Class
Off Center work requires strength, coordination, flexibility and timing. The more risk involved, the more precise the preparation has to be. This excerpt from , "Contemporary Dance Training, the Gutelius Class," defines the basic elements that support Off Center movement and demonstrates how they are developed in the Graham Technique class. The entire program including 65 minutes of exercises for the Floor, Barre, Center, with Combinations and Jumps, and a 25 minute coaching class, and written study support is available.
Working With Resistance In Graham Technique
Visualizing resistance to an imagined force pulling or pushing the dancer, intensifies movement and increases the physicality of traveling movement. Control and balance moving backwards, to the side, or forward in space with full momentum requires perfect placement. The base of the throat centered over the pelvic center and the back of the head over the sacrum allows the dancer to fully achieve maximum reach and extension into space.

A Helpful image for a beginner can be a Tree with roots, trunk and branches.
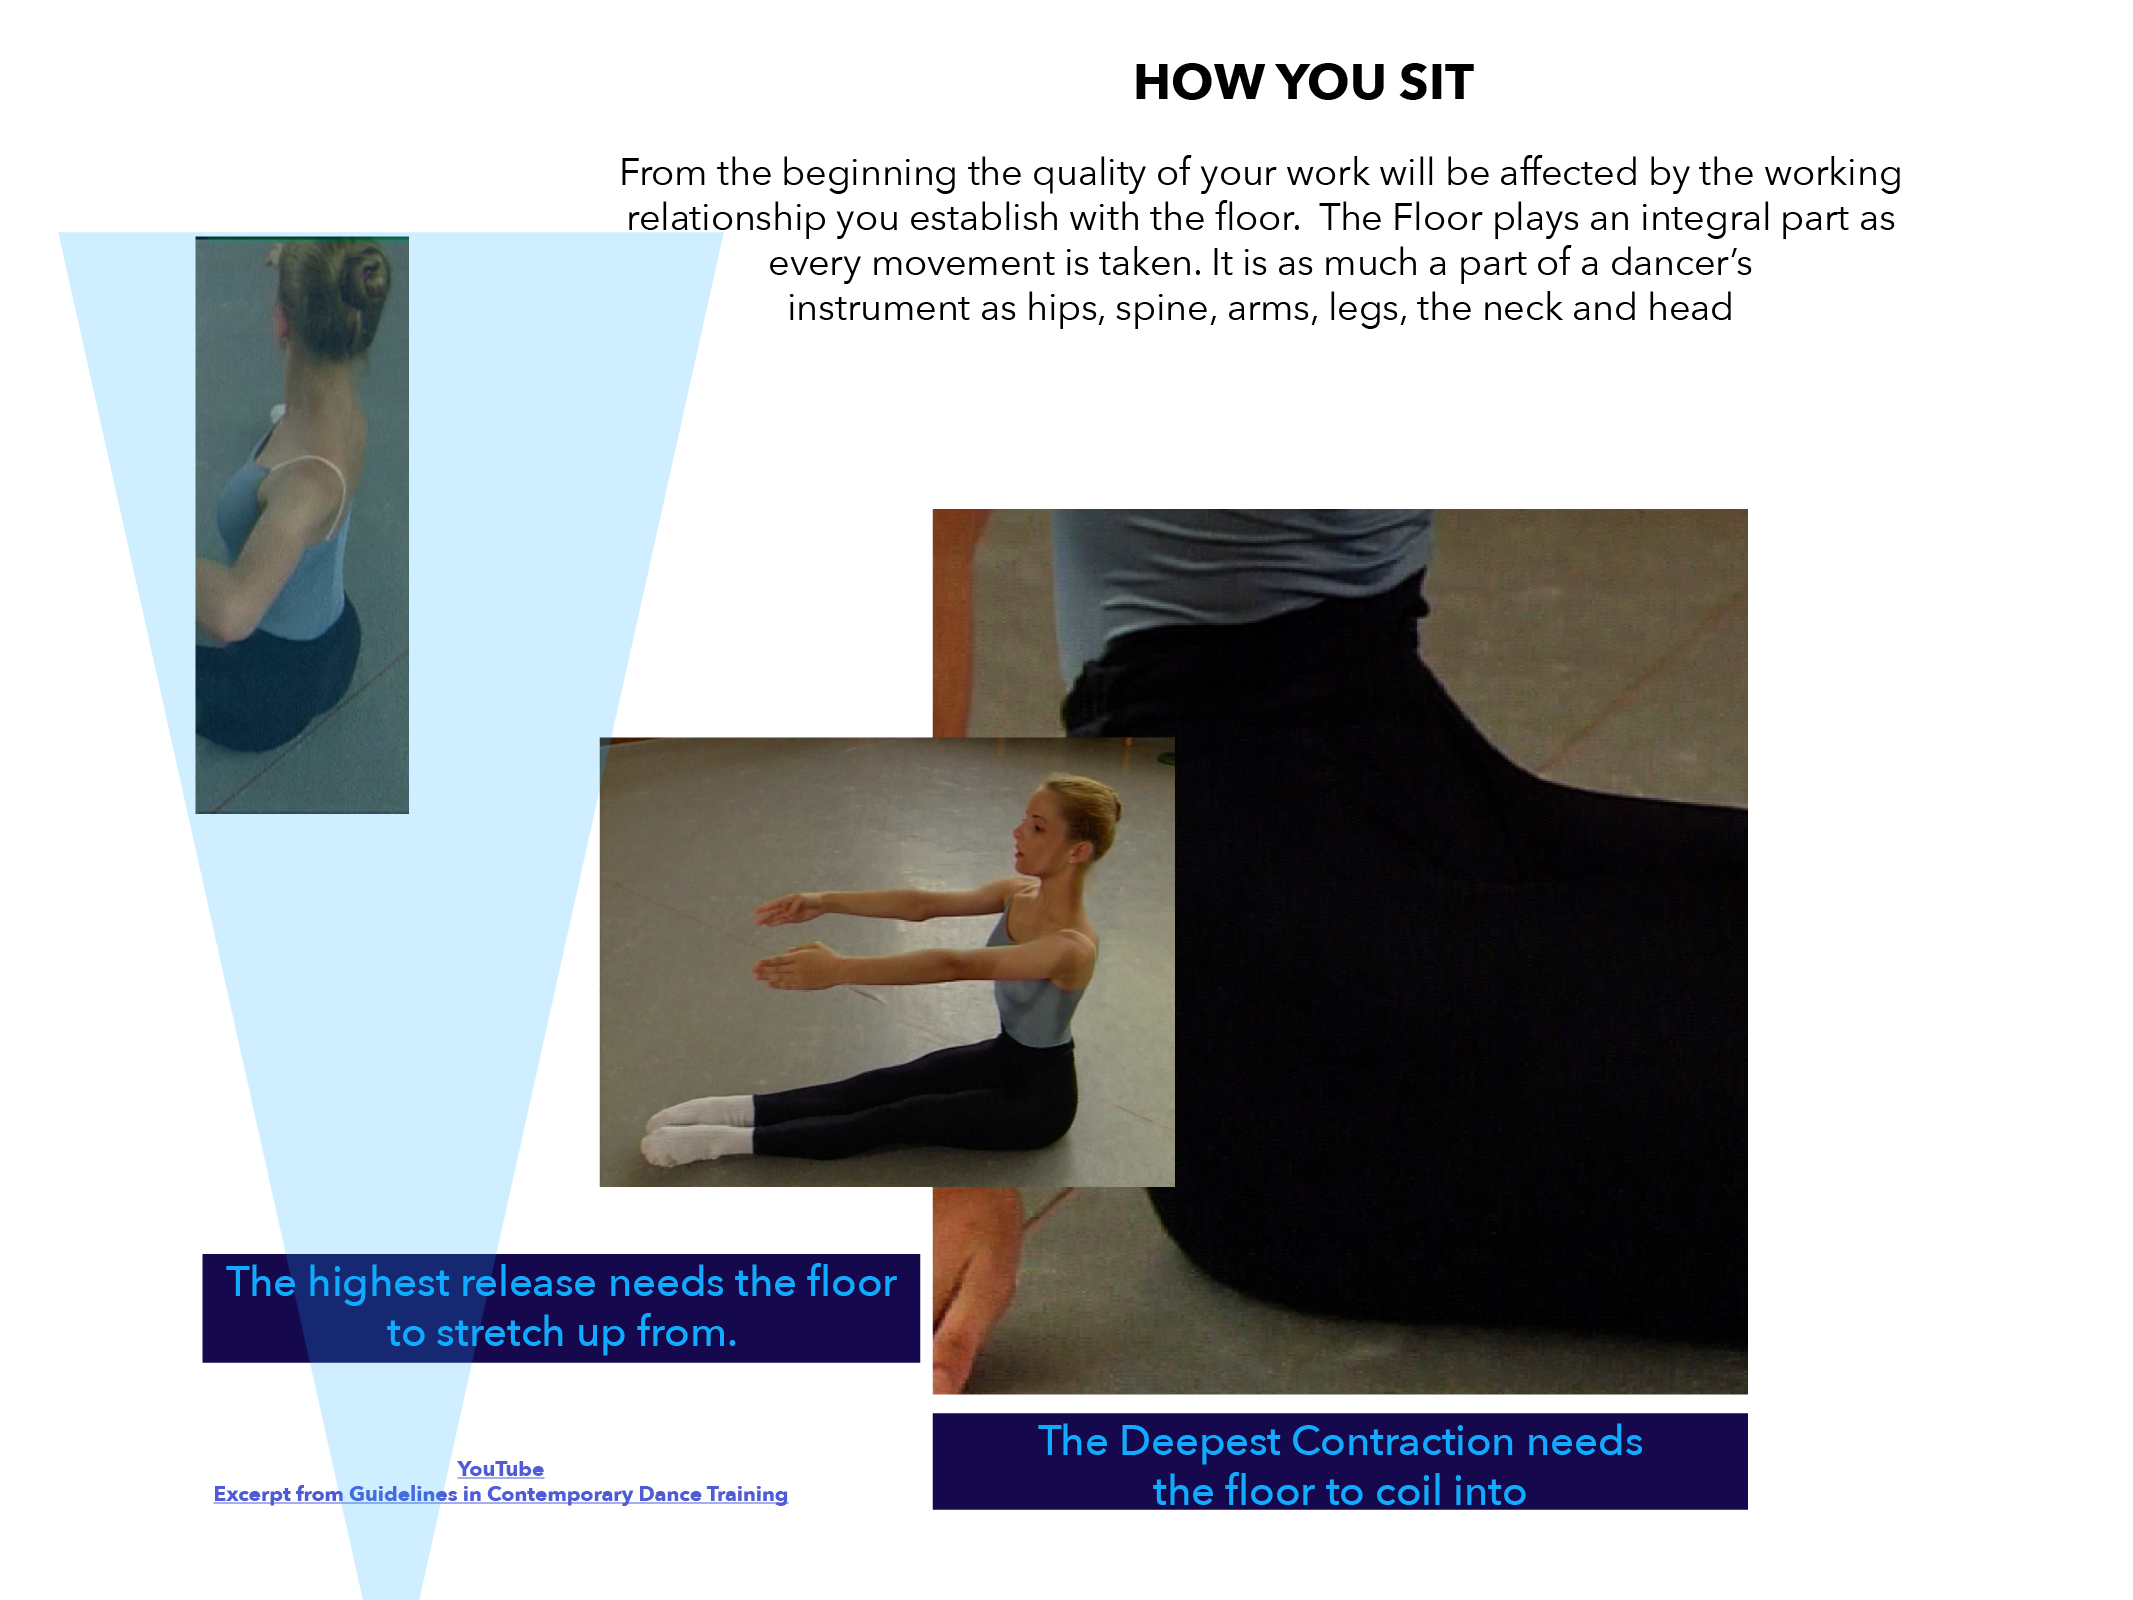
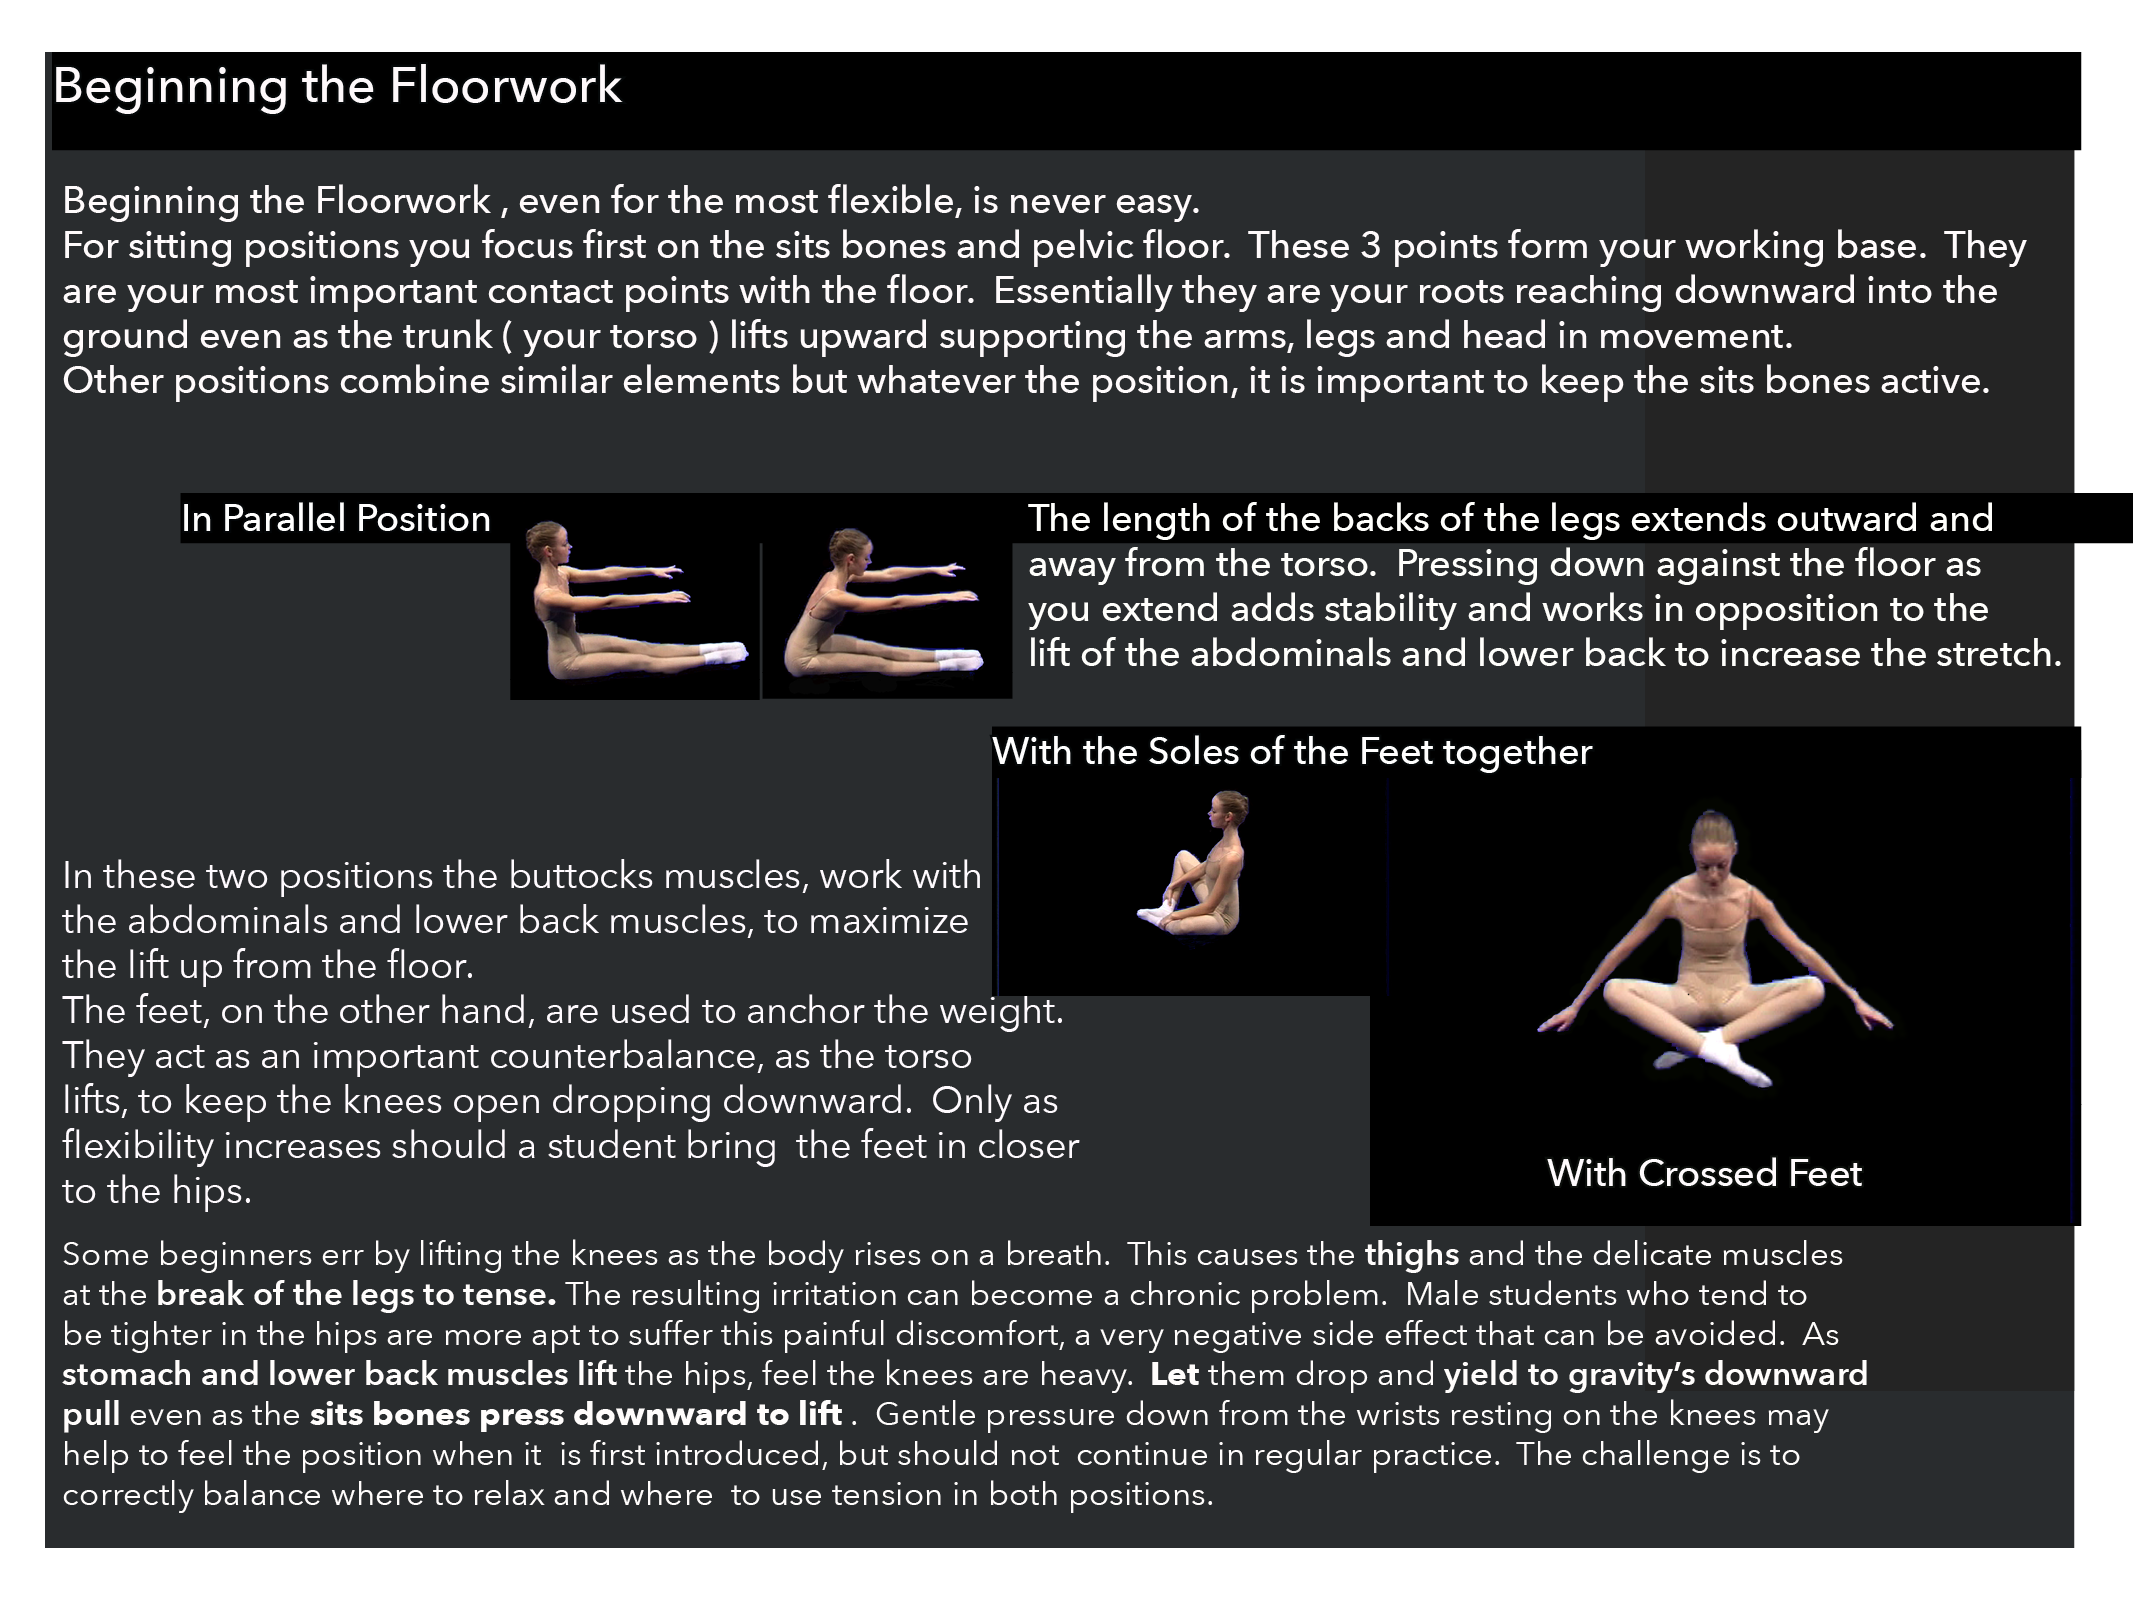
Begin by establishing an attitude to the ground, the idea of a rooted connection. View the floor as an extension of your instrument. It is a part of you, as you are a part of it. Whether you are lying, sitting, kneeling or standing, whether you are moving up from down to, or traveling across the floor, you are always connected.
You are aware of, and actively using the floor to create a specific quality of movement.
Tension
With the body in movement different types of tension are possible
An example of tension to encourage in dance training would be the tension of an elastic band, stretched to maximum extension with all of its built up energy. Two physical qualities you use to stretch the elecastic, strength and flexibility, are also essential assets for any dancer.
Tension to avoid would be the tension that builds when a fist is help tightly, gripping. To hold a tightened fist, muscles will grip and cramp, limiting flexibility and range of movement. Movement quality becomes tight, static, without breath or flow. The student also becomes more vulnerable to injury. There is no pleasure in moving this way!
Another source of unwanted tension can be incorrect placement. If work shifts from the center power sources to lesser, weaker parts of the body, an immediate reaction is to tense. This also happens if a students over-reaches beyond their limit of strength or range of movement.
Braced Arms
Braced Arms Develop the Student Awareness to Use the Core as the Movement Source
The pressure of the hands, down against the floor activates a high lift to help the student to assemble Hips, Ribs, Shoulders, and Head into an integrated unit for changes from Center to Off Center. Using Braced Arms also helps to establish the awareness of a basic Graham Technique Movement Principle: That the pelvis controls, supports, and balances movement. Braced Arms also will encourage Correct Placement. It is important to keep in mind that ever student’s arms varies in length in relationship to their torso. This means that each will have to adjust how much the elbows flex and where to place the hands. For all students, the Elbows should be squared to the side Elbows, Hands, Fingers Directed away from the body in a line to the centerpoint of the Hips.


